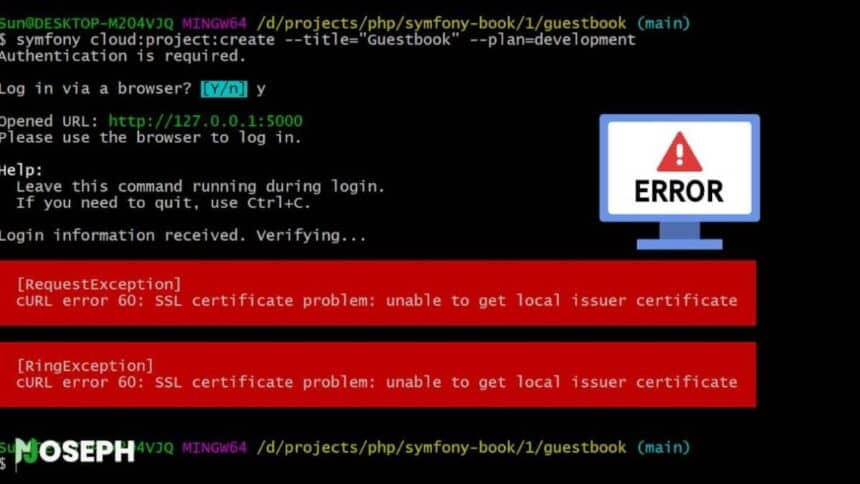
When your computer shows the error “SSL Certificate Problem: Unable to Get Local Issuer Certificate” it is telling you there is a problem with verifying a secure connection with a server. This happens because your computer cannot trust the server’s security credentials.
Curl is like your all-in-one tool for interacting with the internet. You can use it to download files check your internet speed or just fetch data Curl handles it all. I find Curl particularly useful for quick updates on Proxmox or other server management tasks. It is popular because it understands all the languages that websites use from HTTP and HTTPS for web surfing to FTP for moving files around.
SSL certificate errors are like warning signs that tell you something is not right when your computer tries to establish a secure connection with a website. These errors usually mean there is something wrong with the website’s security certificate. It could be out of date not recognized as legitimate or not matching the website’s name. When Curl encounters these SSL issues it stops what it is doing to keep your information safe.
You might be wondering if Curl is only useful for simple tasks like browsing or quick downloads. Yes Curl is also a big deal on servers. It handles tasks like automating downloads testing web services and much more. This versatility makes Curl a go-to tool for both personal and server use. Its ability to manage different web protocols and spot SSL issues is why it is trusted to keep everything running smoothly and securely.
In this guide I will explain why these errors occur and how you can fix them using Curl. By following the steps provided you will learn how Curl works and how to handle SSL certificate problems effectively. This will help you ensure that your web interactions remain secure and reliable.
What Causes SSL Certificate Errors in Curl?
Now that you understand the importance of SSL certificates and how Curl works, let’s explore why these SSL errors occur. When you see the error “Unable to Get Local Issuer Certificate,” it is usually because Curl cannot verify the server’s SSL certificate. This error typically arises from one of three main issues:
- Missing CA Certificate: Your computer comes with a list of trusted Certificate Authorities (CAs). If the server’s SSL certificate is from a CA that is not on your list, Curl will not trust it. For example, when you run a command like
curl https://example.com, you might see an error message such ascurl: (60) SSL certificate problem: unable to get local issuer certificate. - Outdated CA List: The list of trusted CAs on your device needs to be up to date. Over time, new CAs are added, and old ones are removed. If your CA list is not current, Curl might fail to recognize even valid certificates. Updating your system’s CA certificates often resolves this issue.
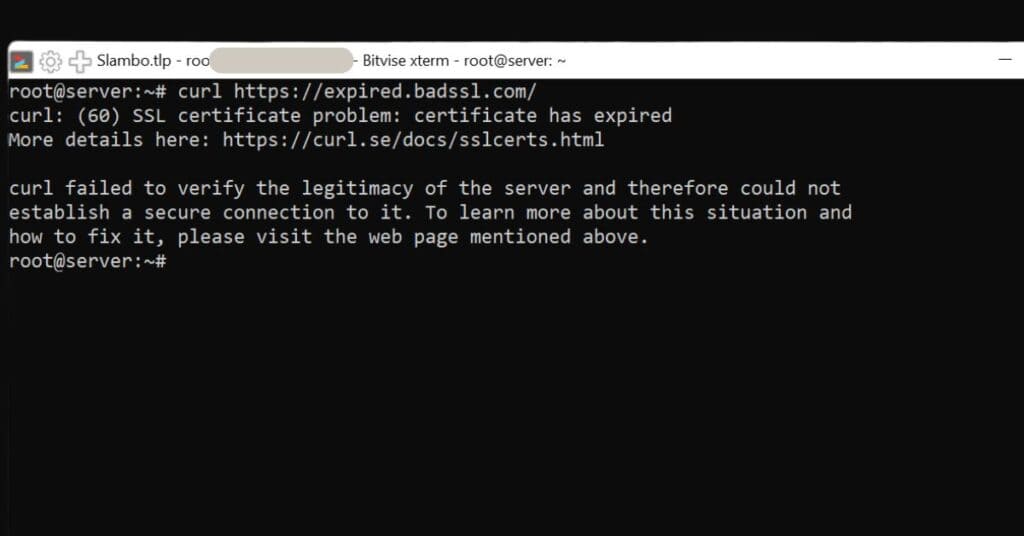
- Server Misconfiguration: Sometimes, the problem is on the server side. If the server does not provide a complete certificate chain, Curl will not be able to verify the connection. For instance, I encountered this issue on my Ubuntu server when I ran
curl https://expired.badssl.com/. This command resulted in the error message:curl: (60) SSL certificate problem: certificate has expired. This error happened because the server’s SSL certificate was intentionally expired, illustrating a common server-side misconfiguration.
Understanding these root causes is crucial for diagnosing why Curl might be flagging an SSL certificate issue. Ignoring these errors can lead to serious security vulnerabilities, so taking the right steps to fix them is essential. In the following sections, I will guide you through practical solutions to address each of these issues, ensuring your connections remain secure.
How to Fix the “Unable to Get Local Issuer Certificate” Error on Ubuntu/Linux
Getting the “Unable to Get Local Issuer Certificate” error on Ubuntu or Linux? Don’t worry, it’s a common issue when your system can’t verify a server’s SSL certificate. This often happens because your list of trusted Certificate Authorities (CAs) is outdated, or the server’s certificate chain is incomplete. Here’s how you can fix it.
First, you’ll want to update your system’s CA certificates. These certificates are what your system uses to verify the security of websites. Keeping them up to date is key to avoiding SSL errors. To do this, open your terminal and run the command to update your system and reinstall the CA certificates:
sudo apt-get update && sudo apt-get install --reinstall ca-certificates
This refreshes the list of trusted CAs, and for most people, this step should fix the issue.
But if you’re still seeing the error, the problem could be on the server’s end. It might not be providing the full SSL certificate chain (which includes the server certificate and the intermediate certificates that link it to a trusted root certificate). To check this, you can use the following command to inspect the certificates the server is sending:
openssl s_client -connect example.com:443 -showcerts
This command will show you the entire chain of certificates from the server. If there’s anything missing, like an intermediate certificate, the server might need to be configured correctly. If you don’t control the server, you can contact the administrator to fix the SSL setup.
In some cases, your system might not recognize the server’s certificate even after updating. If that’s the case, you can manually download the server’s certificate. To do this, run the following command in your terminal:
echo | openssl s_client -connect example.com:443 | sed -ne '/-BEGIN CERTIFICATE-/,/-END CERTIFICATE-/p' > server.crt
This command will download the certificate and save it as server.crt. Once you have the certificate, you’ll need to add it to your system’s trusted certificates. First, move the file to the directory where your system stores trusted certificates, then update the certificates:
sudo cp server.crt /usr/local/share/ca-certificates/
sudo update-ca-certificates
This tells your system to trust the server’s certificate in the future, resolving the error.
If the issue still isn’t fixed, the problem is likely with the server’s SSL configuration, especially if the intermediate certificates are missing. You can ensure the server provides the full certificate chain (usually by configuring it to use the fullchain.pem file).
By following these steps, you should be able to fix the “Unable to Get Local Issuer Certificate” error, ensuring your system can securely connect to the server without any SSL issues. This not only keeps your connections safe but also makes sure everything runs smoothly.
How to Fix the “Unable to Get Local Issuer Certificate” Error on macOS
Encountering the “Unable to Get Local Issuer Certificate” error on macOS usually means that your system is having trouble verifying the SSL certificate from a server. Fortunately, macOS uses the built-in Keychain to manage trusted Certificate Authorities (CAs), so resolving this issue is straightforward.
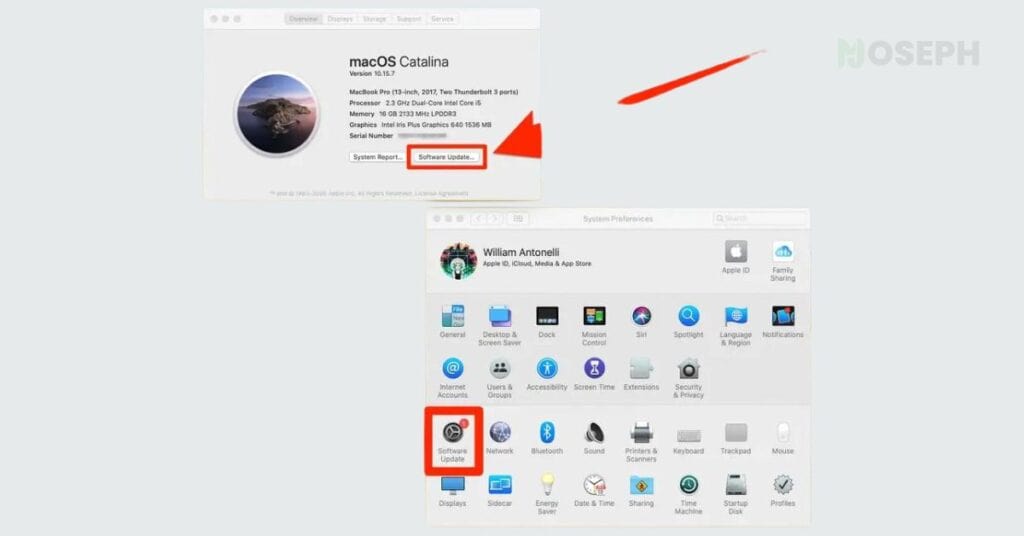
First, ensure your system’s CA certificates are up to date. On macOS, these are typically updated automatically through system updates. To check for updates:
- Go to System Preferences.
- Click on Software Update.
- If updates are available, install them. This keeps your system’s list of trusted CAs up to date.
If updating doesn’t fix the error, you might need to manually add the missing certificate to the Keychain.
To get the SSL certificate from the server:
- Visit the server’s website in a browser, view the certificate details, and export it.
- Alternatively, you can use Curl, but avoid using
--insecureunless you’re sure it’s safe, as it bypasses SSL verification, which defeats the purpose. Instead, directly use the system’s built-in Keychain, which usually handles certificates correctly.
For downloading the certificate, the correct approach is to rely on the macOS Keychain:
- Open Keychain Access on your Mac.
- Import the certificate into the System keychain.
- In Keychain Access, right-click on the certificate, select Get Info, and set it to Always Trust.
If the problem persists, it may be due to a misconfiguration on the server. You can check the server’s SSL configuration by running this in the terminal:
openssl s_client -connect example.com:443 -showcerts
This will show you the certificate chain the server is using, which can help you identify any issues like missing intermediate certificates.
By following these steps, you should be able to resolve the “Unable to Get Local Issuer Certificate” error on macOS. Keeping your CA certificates updated and managing them through the Keychain ensures that your connections remain secure.
How to Fix the “Unable to Get Local Issuer Certificate” Error on Windows
I know Windows users might find it frustrating when they encounter the “Unable to Get Local Issuer Certificate” error. This error usually means your computer is having trouble verifying the SSL certificate from the server. Fortunately, there are straightforward steps you can take to fix this issue.
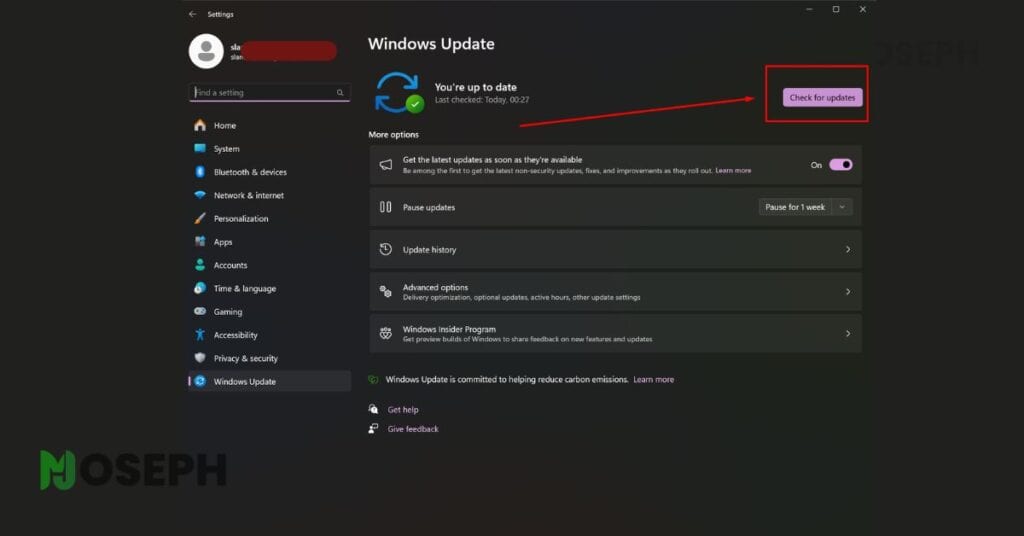
First, make sure your system’s list of trusted Certificate Authorities (CAs) is up to date. On Windows, these certificates are typically updated through Windows Update. Head over to “Settings” > “Update & Security” > “Windows Update” to check for any available updates. If updates are available, install them. Keeping your system up to date is a key step in resolving SSL certificate problems.
If updating doesn’t do the trick, you can use the --ca-native flag in Curl. This flag is crucial because it makes Curl use the native certificate store built into Windows. Curl typically uses Schannel (Windows’ built-in SSL/TLS) by default, which automatically relies on the system’s trusted certificates. By using --ca-native, you ensure Curl is checking the same trusted authorities your computer does, avoiding unnecessary SSL verification issues.
Here’s the correct command:
curl --ca-native https://example.com
This command tells Curl to rely on Windows’ trusted CAs, which solves most SSL problems. It’s much safer than using --insecure, which skips verification entirely and should be avoided whenever possible.
If the error persists, you might need to manually add the missing certificate to your system. This involves downloading the SSL certificate from the server and adding it to your list of trusted certificates. You can do this using the Microsoft Management Console (MMC):
- Press Win + R, type
mmc, and hit Enter to open the Microsoft Management Console. - In the MMC, go to File > Add/Remove Snap-in….
- Choose Certificates and click Add.
- Select Computer account, then click Next and choose Local computer, and click Finish.
- Expand Certificates (Local Computer) in the MMC, and navigate to Trusted Root Certification Authorities > Certificates.
- Right-click on Certificates, choose All Tasks > Import…, and follow the wizard to import the certificate you downloaded.
After you’ve added the certificate to your system’s trusted list, the error should be resolved.
If the problem continues, it might be due to a server-side issue. To dig deeper, you can check the server’s SSL configuration using OpenSSL, though this tool isn’t pre-installed on Windows. You can install OpenSSL or run this command in a Linux subsystem:
openssl s_client -connect example.com:443 -showcerts
Replace example.com with the server’s domain. This will show the certificate chain and help identify any issues with the server’s SSL setup.
By following these steps, you should be able to fix the “Unable to Get Local Issuer Certificate” error on your Windows system. Keeping your CA certificates updated and manually adding any missing certificates will ensure your connections remain secure.
Additional Steps for Resolving Curl SSL Certificate Issues
Even after following the main steps to resolve the “Unable to Get Local Issuer Certificate” error, you might still face challenges. These issues can sometimes stem from factors beyond the immediate trust relationship between your device and the server, such as outdated software or network configuration problems.
To refine your troubleshooting process and ensure a secure connection, consider the following additional strategies:
- Update Curl: Make sure you are using the latest version of Curl. Newer versions include important security updates and bug fixes that can resolve SSL issues. You can update Curl by following the instructions specific to your operating system or by visiting the official Curl website for the latest release.
- Explore Curl Documentation: The official Curl documentation is a valuable resource, offering specific advice for handling SSL errors tailored to different versions. It’s always a good idea to check the documentation for any additional flags or configurations that might help resolve your issue.
- Review Network Configuration: Sometimes, SSL certificate issues can be caused by network settings like firewalls or proxies that are incorrectly configured. Ensure that your network settings allow SSL/TTLS connections and that there are no blocks or filters that might interfere with Curl’s ability to connect securely.
- Check System Time and Date: SSL certificates are highly dependent on the correct system time and date. If your system’s clock is out of sync, it can cause Curl to reject otherwise valid certificates. Make sure your system time and date are accurate, and if necessary, sync them with a reliable time server.
- Verify Server Name Indication (SNI) Support: Server Name Indication (SNI) is a feature that allows a server to present multiple certificates on the same IP address and port number, which is crucial for SSL connections to many modern websites. Ensure that your version of Curl and your server support SNI. If SNI is not supported or configured correctly, it can lead to SSL certificate errors.
- Reach Out to Server Support: If you’re still encountering issues with a specific server, it might be worth contacting the server’s technical support team. They can provide insights into whether the problem is on their end, such as a misconfigured server or an expired certificate.
By incorporating these additional steps into your troubleshooting routine, you broaden your approach to resolving SSL certificate issues. These strategies help ensure that you are covering all possible bases, leading to a more comprehensive and effective solution.
Wrapping Up
Dealing with the “Unable to Get Local Issuer Certificate” error in Curl is about making sure your connections are safe and your data is protected. By taking the steps we’ve outlined, you’re ensuring that your online activities are secure and that you’re not leaving yourself exposed to unnecessary risks.
If these steps helped solve the issue for you, feel free to share your experience in the comments. And if you’ve found other solutions that worked, I’d love to hear them too. Keeping our online interactions secure is something we all benefit from, so let’s keep the conversation going.

